January Monthly Newsletter
Tracy Allen tkcraftsandcards@gmail.com 541-579-6682
Facebook; TKCraftsandCards Pinterest: tkcraftsandcards
January Specials
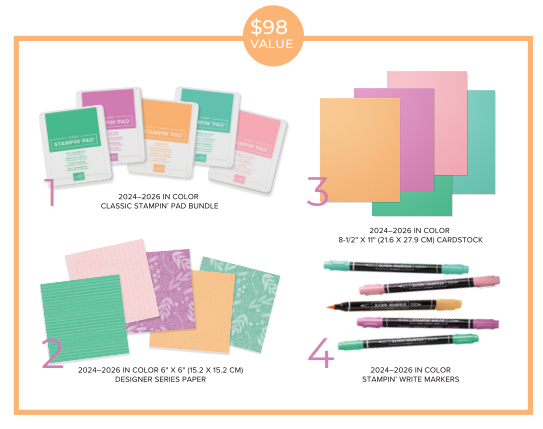
Do you love free stuff? ME TOO!!! Place an online order of $50 and
receive 8 (6”x6”) sheets of a
variety of our NEW Designer
Series Paper from our Jan.-June Mini Catalog.
Be sure to enter Host Code BTA9ZK7F
If your order is over $150,
do not enter the host code. You are the host and receive the host credits as
well as the Paper Pack.
Upcoming Events
Monthly Card
Classes: Participants create 4 to 5 different
cards and get to try out the latest Stampin’ Up! products. The class fee is FREE with a $25 order
or $15. Class includes pre-cut papers, embellishments, and use of the tools,
stamps and stamp pads to complete your projects. The class is self-paced, so
you can go at your own speed. Be sure to bring your favorite adhesive.
Class Time: 1 p.m. to 3:30 p.m. Class location: 3220 W. Harrison, St, Chandler, AZ 85226
January 2nd – New Mini Catalog Kickoff
& Sale-a-Bration February
6th – Valentines Cards
Be sure to RSVP
by email at tkcraftsandcards@gmail.com or on
Facebook:
https://www.facebook.com/TKCraftsandCards/events
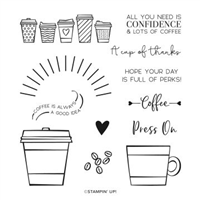
Hello Dear Friend Card Kit - January
16th, 12:30 - 2:30 p.m.
Cost: $37 In-Person or To Go (Prepayment
Required)
This beautiful kit includes
everything you need to make 12 cards including stamps, ink, card bases,
envelopes, a stamp block, embellishments, and color directions. Sentiments
include “A Day to Remember”, “Thank You”, “Hello Dear Friend”, and “You Make My
Heart Smile”. This kit is the perfect all-occasion card set for any time of
year.
Class fee includes your
complete kit and the use of any additional ink colors. We will also have
several door prize drawings.
RSVP for this
event at https://forms.gle/qeLRTLsitycU3RvW9
SPECIAL
EVENT - Mother Daughter Valentines Crafting Day
Saturday,
January 30 - 11 AM to 1 PM
Cost:
$20 per group (mom/daughter attending) Additional sets of 10 cards can be
added $15 each. Prepayment Required.
You
and your daughter (or Granddaughter, Son, Grandson, etc.) will be working
together to create 10 Valentine’s cards. This includes 10 cards and envelopes,
color directions, and all the embellishments to go with them.
In-person
class attendees will also enjoy some special mother/daughter time together,
door prizes, and a sweet treat. Bring: adhesive, scissors
To
Go option available (does not include stamps or ink)
RSVP here by Jan. 20th
to secure your spot: https://forms.gle/QBW4kL6ftZg9gtSt8
Our New Spring Mini Catalog is here!!!
So many new items
to choose from, beautiful new papers, gorgeous stamp and die set, and tons of
new embellishments and ideas.
View our catalog
here: https://su-media.s3.amazonaws.com/media/catalogs/2021%20January-June/catalogs/JJ_2021_US.pdf
Sale-a-bration! Means FREE products for YOU!!!
January 5th
to February 28th – for every $50 or $100 you spend on amazing
Stampin’ Up! products, you get to choose something FREE!!!
View all our Free
items here: https://su-media.s3.amazonaws.com/media/Promotions/2021/SAB/2021_SAB_US.pdf
Shop
all our amazing products here: https://www.stampinup.com?demoid=2207115
We’re on YouTube: If you haven’t been able to join us on Facebook, we
have a new option for you. Check out our past Facebook Lives on YouTube. Be
sure to click SUBSCRIBE.
https://www.youtube.com/channel/UCTOXUgG69nKIhZD1y49VT1A
Facebook Lives: Join us on Facebook this month for some fun product
demonstrations, beautiful card samples and fun prizes. All times are listed in MST. All Lives are
on my Facebook Business page unless stated otherwise below. https://www.facebook.com/TKCraftsandCards/
Facebook Lives are on Friday Evenings. Check our facebook
posts for times.
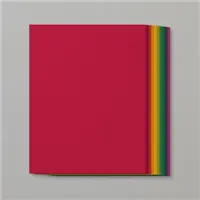
Stampin’ Up! makes is SO easy to make new
friends doing what you love and right now we have an INCREDIBLE joining
special. For only $99 you get to choose $125 from any of our current
catalogs (including the brand new Stampin’ Cut & Emboss Machine) and the
new Jan. to June Mini Catalog. And right now you get 5 full packs of our 6”x 6”
designer series paper in all our current colors (this paper will come out in
our new annual catalog in May so you get it before everyone else!!). It’s an additional $68 value!
There's no obligation if you get the kit, so what's holding you
back?! This is the BEST deal we offer!
I can answer any questions you have. Remember you don’t have to do parties or
anything you don’t want but you will get to join our special VIP group and earn
prizes just for participating. I also offer access to training, live and online
meetings, incentives, card swap opportunities, exclusive Facebook group, and
more!
Let me know if
you’re ready and I can help. You can also sign up for the kit yourself
here! https://ida.stampinup.com/en/?demoid=2207115
Host your own online home party and earn free
Stampin’ Up! product!
Host
a Facebook online party to receive free Stampin’ Up! product. It’s so easy. I
do all the work for you. All you do is invite your friends and engage and you
earn free product!!! Contact me today by
email to get your party started. tkcaftsandcards@gmail.com
*Host a party in January or February and qualify for the exclusive
Punch Party host stamp set (must have minimum sales of $300)
Paper Pumpkin – Monthly Stamp Kit Subscription
Paper Pumpkin is our amazing monthly
subscription kit. For only $22 plus tax you get a box filled with everything
you need to complete that month's craft project including stamps and ink.
EVERYTHING!!
This amazing kit comes out each month.
January Kit: Sending
Hearts
Love is in the air! Send a little love to someone special
with the Sending Hearts Paper Pumpkin Kit. From heaps of heart-shaped elements
to paper pieces in red and pink, this month’s kit has everything you need to
create eight adorable cards—with coordinating envelopes—for Valentine’s Day,
anniversaries, and every celebration of love in between!
For only $22 (that includes
shipping), you receive a project each month that includes a stamp set and ink
spot. You can preview the theme each month and are under NO obligation (just
sign in to your account and skip that month if you aren’t interested).
Sign Up today: https://www.paperpumpkin.com/en-us/sign-up/?demoid=2207115