Saturday, July 18, 2020

Z-Fold Card


Use any variety of Designer Series Paper to make these beautiful cards - See examples below
  • Card Base: Whisper White Cardstock 8 1/2" x 11", Score at 2 1/8" and 4 1/4" (or fold in half, then take the front panel and fold it back in half to the center of the card). This creates a Z fold card.
  • Cut Designer Series Paper to 4" x 5 1/4" and adhere to the center of the card base. 
  • Cut Designer Series Paper to 2" x 5 1/4" and adhere to the center flap of the card.
  • Cut Designer Series Paper to 2" x 5 1/4" and adhere to the front flap of the card (the flap that you folded back). When you open the card you should see all 3 Designer papers on the same side. 
  • Cut Coordinating Color Cardstock to 2 1/2" x 2 1/2" 
  • Cut two pieces of Whisper White Cardstock to 2 1/4" x 2 1/4" 
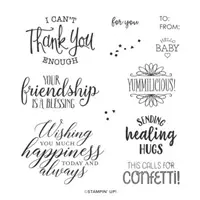
  • On one of the Whisper White squares, Stamp a sentiment to the center top (leave room for ribbon underneath) using coordinating ink color. Adhere this piece to the coordinating Cardstock square.
  • Cut a piece of the Ribbon or Twine and wrap it around the bottom of the sentiment/bumblebee cardstock 3 times, then tie in a bow. 
  • Adhere sentiment to the front panel. Remember to ONLY put adhesive on one side of the back of the sentiment. You only want it to stick to the left side panel so you can open the card.
  • On the last square piece of Whisper White cardstock, stamp a sentiment "in coordinating ink at the top of the card. 
  • Adhere this sentiment to the inside panel. Before sticking it down, ensure that when the card closes, this piece is completely covered by the top sentiment. 


Video on YouTube: https://youtu.be/OZEGzfVI_MI

Tuesday, July 14, 2020

Misty Moonlight and Flowers for Every Season Cards


 Framed Flowers

Card base: Misty Moonlight 8 1/2" x 5 1/2" (fold in half)

  • Cut Whisper White cardstock to 3 3/4" x 5"
  • Cut Designer Series Paper (3 different papers)  cut to 3 1/2" x 1 1/2" 
  • Adhere the Designer Series Paper to the white cardstock Start by adhering to the two outside pieces, then add the centerpiece and center and center between the other two DSP papers. 
  • Cut Misty Moonlight ribbon to 21" and tie around using a bow. 
  • Adhere to the center of the card front using Stampin' Dimensions 
  • On a piece of Whisper White cardstock stamp the 'Sending Healing Hugs' in Misty Moonlight ink then use the Stitched So Sweetly Dies to cut out the stamped image.
  • Adhere the stamped image to the front right of the card using Stampin' Dimensionals.


Misty Moonlight Flowers
Card base; Whisper White Cardstock 11" x 4 1/4"

  • Cut Misty Moonlight cardstock to 4 1/8" x 5 3/8"
  • Cut Designer Series Paper to 3 7/8" x 5 1/8" and adhere to the Misty Moonlight cardstock
  • Use the Stitched So Sweetly to cut out a large background in Misty Moonlight cardstock. Adhere to the center of the card front.
  • Cut Whisper White Tulle ribbon to 16" and tie around the center of the card (overlapping the Misty Moonlight cut out. Tie in a knot.
  • Adhere the cardstock to the card front center. 
  • On a piece of Whisper White cardstock stamp the '..Thank You' in Misty Moonlight ink then use the Stitched So Sweetly Dies to cut out the stamped image.
  • Adhere the stamped image to the front center of the card using Stampin' Dimensionals.

View our YouTube how-to video here: https://youtu.be/Wja4i0PqqTY 

Thursday, July 9, 2020

Floral Essence Cards - Stampin' Up!

https://youtu.be/Ru3ZGvmQ1B0

Floral Essence Cards - Stampin' Up!


https://youtu.be/Ru3ZGvmQ1B0
Stamps - Floral Essence
Card Base: Rococo Rose Cardstock - 8 1/2" x 5 1/2" fold in half.
  • Cut Designer Series Paper to 4" x 5 1/4" and adhere to the center of the card base. (I used the beautiful Granite Gray floral from Peony Garden DSP pack). Set aside.
  • Cut Whisper White cardstock to 4 1/4" x 3" 
  • Begin by stamping the sentiment in Gray Granite on the center-right of whisper white cardstock.
  • Stamp two medium flowers in Rococo Rose ink.
  • Use the flower center stamp in Rococo Rose ink, then stamp off on scratch paper once before stamping in the center of the flower. This will create a lighter color that coordinates. Repeat with both flowers.
  • Stamp the leaves by inking only the area of the stamp you wish to stamp (I check first by overlapping the clean stamp on the flower and then inking the leaves that I want to show). Use Pear Pizzaz ink.
  • Adhere the white cardstock to the center of the card base/designer paper using Stampin' Dimensionals. 
  • Using a scrap piece of Rococo Rose cardstock, stamp two of the "3 petal" flower images in Rococo Rose ink.
  • Use the Perennial Flower Punch to punch out the two sets of petals. Use a bone folder to gently curl the edges of each petal up to add dimension.
  • Adhere the two petals together.
  • Use the Rococo Rose Light Stampin' Blend Marker to color a large Basic Pearl. Adhere to the center of the flower and adhere the flower to the center-left on the card front. 
  • Use the Rococo Rose Light Stampin' Blend Marker to color three small Basic Pearls and adhere them around the sentiment on the card front.

https://youtu.be/Ru3ZGvmQ1B0
Stamps - Floral Essence
Card Base: Whisper White Cardstock - 8 1/2" x 5 1/2" fold in half.

  • Cut Rococo Rose cardstock to 4" x 5 1/4" and adhere to card base front. 
  • Cut Designer Series Paper to 2" x 5 1/4" and adhere to the left side of the Rococo Rose cardstock leaving 1/4" gap. (I used the beautiful Granite Gray floral from Peony Garden DSP pack). 
  • Cut Whisper White cardstock to 3/4" x 2 3/4". In Granite Gray Ink, stamp the sentiment.
  • Adhere the sentiment to the card front at just below the center-right of the card using Stampin' Dimensionals.
  • On a separate piece of Rococo Rose cardstock, stamp six of the "3 petal" flower images in Rococo Rose ink.
  • Use the Perennial Flower Punch to punch out the six sets of petals. Use a bone folder to gently curl the edges of each petal up to add dimension.
  • Create 3 flowers by adhering two of the petals together. 
  • Adhere the flowers to the front of the card (one below the sentiment and two above the sentiment with two of the flowers slightly overlapping the sentiment.
  • Add a large Basic Pearl to the center of each of the flowers. 

View the step by step video on our Facebook Live here:

 Our amazing special - Don't Miss Out!! ONLY $99 (+ tax) for over $250 in Stampin' Up! Product!!!! It’s Always a Great Time to Join ...