Monday, August 31, 2020

Press On - Stampin' Up!

 Press On - Stampin' Up!  


Confidence & Coffee
  • Card Base - Whisper White Cardstock 8 1/2" x 5 1/2" Fold in half
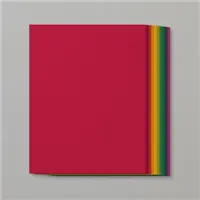
  • Cut Pumpkin Pie cardstock to 5 1/2" x 3 1/2"
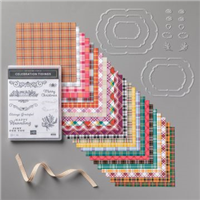
  • Cut Plaid Tidings Designer Series Paper to 5 1/2" x 3" and adhere to the center of the Pumpkin Pie cardstock. 
  • Adhere to the center of the card front (vertically)
  • Cut Black cardstock to 5 1/2" x 1 5/8" 
  • Cut Mango Medley cardstock to 5 1/2" x 1 1/2" and adhere to the center of the black cardstock (set aside).
  • Cut Whisper White cardstock to 5 1/2" x 1 1/4" 
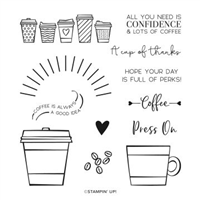
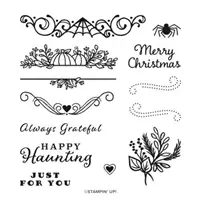
  • Use Momento Tuxedo Black ink to stamp the 5 small coffee cups from Press On stamp set on the right side center of the white cardstock.
  • Stamp the sentiment "All you need is confidence & lots of coffee" on the center left-hand side of the white cardstock using Momento Tuxedo Black ink.
  • Use Stampin' Blends markers (or other coloring tools) to color in the coffee cups. Suggested colors include dark/light Pumpkin Pie, dark/light Mango Medley, Dark Gray Granite. 
  • Adhere the white cardstock to the center of the Mango Medley cardstock, then adhere the panel to the center of the plaid designer series paper on the card front. 


Confidence & Coffee
  • Card Base - Whisper White Cardstock 8 1/2" x 5 1/2" Fold in half
  • Cut Whisper White cardstock to 5 3/8" x 4 1/8" 
  • Use the Tasteful Textile 3D Embossing folder to run the Whisper White cardstock through. 
  • Cut Plaid Tidings Designer Series Paper to 4 1/8" x 2 1/4" and adhere to the top center of the embossed white cardstock.
  • Cut Pretty Peacock cardstock to 4 1/8" x 2 1/4"
  • Stamp the "coffee" sentiment at the top right of the Pretty Peacock cardstock using White Stazon Ink. (allow a minute or two to dry)
  • Adhere the Pretty Peacock cardstock to the center of the Plaid Designer paper.
  • On a scratch piece of Whisper White cardstock stamp the 'to-go coffee cup' image using Momento Tuxedo Black ink. Stamp the heart in the center of the coffee cup using Pretty Peacock ink. Stamp the beams around the top of the coffee cup in Pretty Peacock Ink.
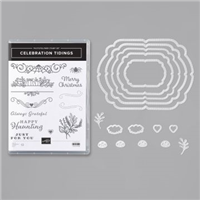
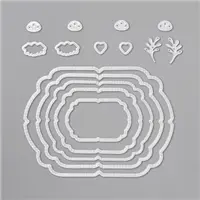
  • Using the large oval from Stitched Shapes dies, cut out the coffee cup image (some of the ends of the beams will be cut off). 
  • Adhere this to the center-left of the card front using Stampin' Dimensionals. 

Saturday, August 29, 2020

Plaid Tidings Christmas - Stampin' Up!

 Plaid Tidings Christmas - Stampin' Up!


Plaid Christmas
  • Card Base - Crumb Cake cardstock 8 1/2" x 5 1/2" Fold in half
  • Use the Celebrations Labels dies to cut out a large decorative oval in Shaded Spruce cardstock and adhere to the center of the card front.
  • Use the Celebrations Labels dies to cut out a medium decorative oval from the Plaid Tidings Designer Series Paper and adhere to the center of the Shaded Spruce decorative oval on the card front.
  • Use the Celebrations Labels dies to cut out a small decorative oval in Whisper White cardstock and stamp the sentiment "Merry Christmas" from the Celebration Tidings stamp set in Cherry Cobbler ink. 
  • Adhere the sentiment to the center-right of the card front using Stampin' Dimensionals.
  • Cut 9 1/2" of Embroidered Ribbon and tie it into a bow. Adhere the bow to the sentiment at the bottom left. 
  • Complete the card by adding three of the gold embellishments around the sentiment from the Wonderful Gems embellishment pack. 


Plaid Christmas Trees
  • Card Base - Cherry Cobbler Cardstock 8 1/2" x 5 1/2" Fold in half
  • Cut Plaid Tidings Designer Series paper to 5 1/4" x 2 1/4" 
  • Cut Shaded Spruce cardstock to 5 1/4" x 1/2" and use the long border die from Ornate Borders Dies to cut the border. 
  • Adhere the border to the bottom of the right side of the Plaid designer paper. Then adhere the plaid paper and border to the left side of the card front. Leave an even amount of space between the left edge and the top and bottom of card. 
  • On a piece of Shaded Spruce cardstock use Shaded Spruce ink to stamp the tree image from the Perfectly Plaid stamp set. Then use the Pine Tree Punch to cut out the tree. 
  • On a piece of Whisper White cardstock use Cherry Cobbler ink to stamp the plaid tree image from the Perfectly Plaid stamp set. Then use the Pine Tree Punch to cut out the tree. 
  • Cut a piece of Whisper White cardstock to 3" x 1 1/2" and stamp the sentiment "Merry Christmas" from the Perfectly Plaid stamp set in Shaded Spruce ink at the bottom right. 
  • Adhere the two trees overlapping on to the left side of the sentiment. 
  • Adhere the sentiment and trees to the center-right of card front using Stampin' Dimensionals. 
INSIDE: 
  • Cut Whisper White to 4" x 3 3/4" 
  • Use Shaded Spruce ink to stamp the sentiment at the top center. Adhere to the inside of card.
  • On a separate piece of white cardstock stamp the plaid tree in Shaded Spruce ink and punch out with the Pine Tree punch. 
  • Ashere to the bottom right of the inside of card.


Friday, August 28, 2020

Happy Christmas Flowers - Stampin' Up!

 Happy Christmas Flowers - Stampin' Up!


Happy Christmas Flowers
  • Card Base - Whisper White cardstock 8 1/2" x 5 1/2"  fold in half
  • Cut Flowers for Every Season Designer Series Paper to 4 1/8" x 5 3/8" 
  • Use the Stitched So Sweetly Dies to cut ou the center of the Designer Paper using the large scalloped rectangle and Adhere the larger outside piece to the center of the card front. 
  • Cut Poppy Parade cardstock to 5" x 3 3/4" 
  • Use the Tasteful Textile 3D embossing folder to emboss the Poppy Parade cardstock.
  • Adhere the Stitched So Sweetly Dies designer paper rectangle to the center of the Poppy Parade cardstock. 
  • Cut the Just Jade ribbon to 21". Wrap it around the Poppy Parade cardstock center and tie a bow on the front left-hand side. 
  • Adhere the Poppy Parade cardstock to the center of the card base using Stampin' Dimensionals. 
  • On a small piece of Whisper White cardstock stamp the sentiment "Happy Christmas" from the Itty Bitty Christmas stamp set in Just Jade Ink then use the small scalloped rectangle from the Stitched So Sweetly Dies. 
  • Adhere the sentiment to the card front right-center on top of the ribbon using Stampin' Dimensionals.
  • Complete the card by adhering three Red Rhinestone embellishments next to the sentiment. 


Thinking of You
  • Card Base - Just Jade cardstock 11" x 4 1/4"  fold in half
  • Cut Poppy Parade cardstock to 4 1/4" x 2 1/4"
  • Cut Flowers for Every Season Designer Series Paper to 4 1/4" x 1 7/8" and adhere to the center of the Poppy Parade cardstock. Then adhere to the top center of the card base.
  • Cut Just Jade cardstock to 3 1/4" x 1 1/2" 
  • Cut Whisper White cardstock to 3 1/4" x 1 1/4" 
  • Stamp the sentiment "Thinking of you at Christmas" in Poppy Parade ink at the top center of the white cardstock. 
  • Adhere the white cardstock to the center of the Just Jade cardstock. Cut a small triangle out of the bottom of the two cardstocks.  
  • Adhere to the card front matching the top of the sentiment cardstock to the top of the Poppy Parade cardstock on the card front. (Right side of card).
  • Complete the card by adhering three Red Rhinestone embellishments above the sentiment. 

 Our amazing special - Don't Miss Out!! ONLY $99 (+ tax) for over $250 in Stampin' Up! Product!!!! It’s Always a Great Time to Join ...